
 Svenska
 Dansk
Dansk
 Suomi
Suomi
 Español
 Deutsch
 Français
 Italiano
 Nederlands
 Polskie
 Norsk
Norsk
Cart
Your cart is empty, but doesn't have to be..
Discount: 0.00 EUR
Digital Skipper |10/07, 2024

Do you want to keep your Raymarine VHF radio in top condition? In this guide, you will learn how to easily and safely update your Raymarine RAY50–RAY91 with the latest software via Axiom, a, c, e, eS, and gS-series multifunction displays. We will go through all the steps – from system requirements to installation – so that your radio, handsets, and hub function optimally. Follow our tips for best performance and a trouble-free update.
To perform the update, you need:
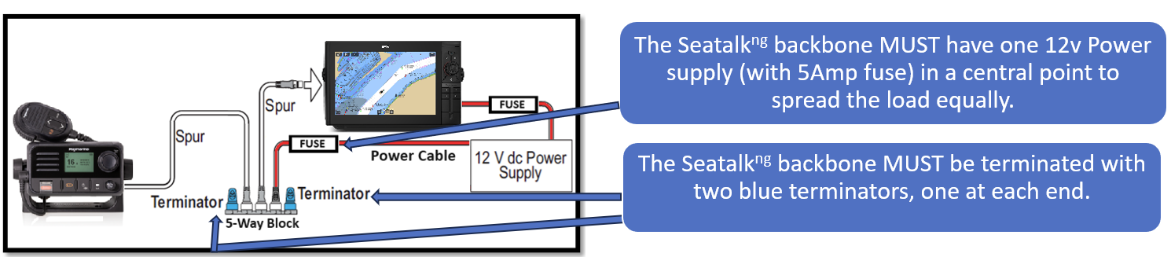
Note: Turn on all Raymarine equipment when updating so that all products are identified and updated if necessary.
Safety first:
Set AUTOPILOT and RADAR to standby before updating. Perform the update in a safe location where support is available if a unit crashes.
Detailed “software update information” can be found in each version of the LightHouse Advanced Operation manual. Always refer to the latest manual if in doubt.
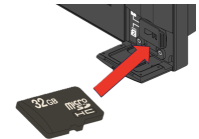
Important about microSD cards:
Type and format:
If your MFD/chartplotter is updated, microSD cards can be formatted to exFAT. Compatibility:
Lighthouse OS – Lighthouse 2 (a/c/e/eS/gS) v17.45+ • Lighthouse 3 (eS/gS) v3.12.199+ • Lighthouse 4 (AXIOM) all versions • Lighthouse Sport (ELEMENT) all versions
Supported types and card sizes per display:
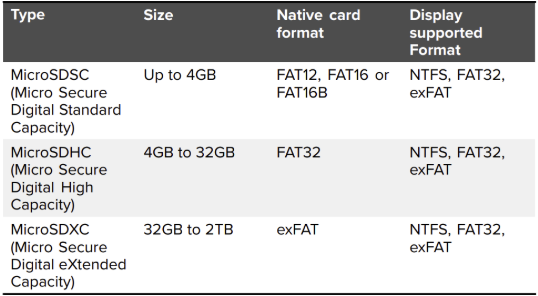
Recommendation: Choose branded cards with Class 10 or UHS for best performance.
NOTE: If the card's original format is not supported by the display, it will not be recognized. Reformat the card using, for example, a laptop/PC.
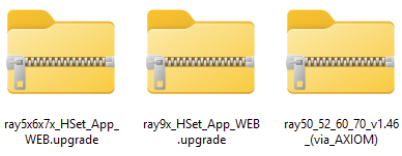
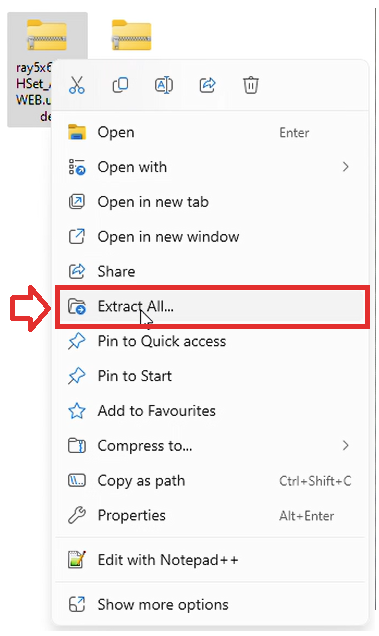
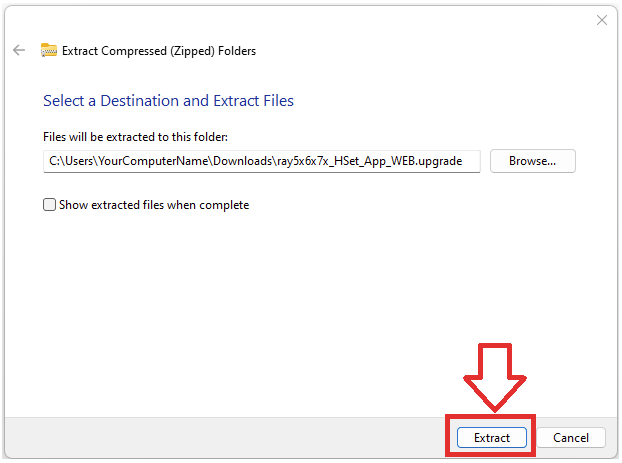
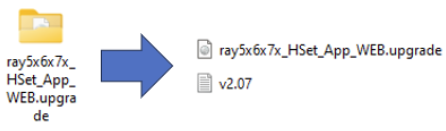
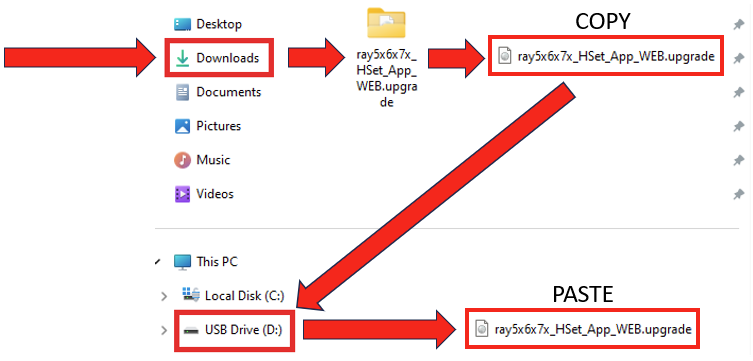
Once the card is formatted: download the latest software from Raymarine and copy the correct files to the card.
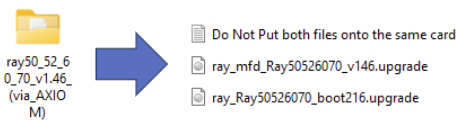
IMPORTANT: For RAY50–52–60–70 with Boot code < v2.16: first update Boot code to v2.16, then the software. Otherwise, you risk corruption and incorrect radio function. The process is done in two steps: 1) Boot code file, 2) software file.
If you cannot complete the process – contact an authorized dealer or product support.
Once the software is downloaded:
NOTE: Be careful:
Once the software (or Boot code) is on the card:

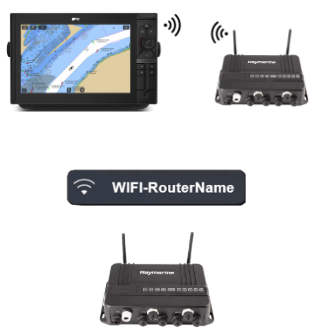
(Skip if you do not have wireless handsets.)
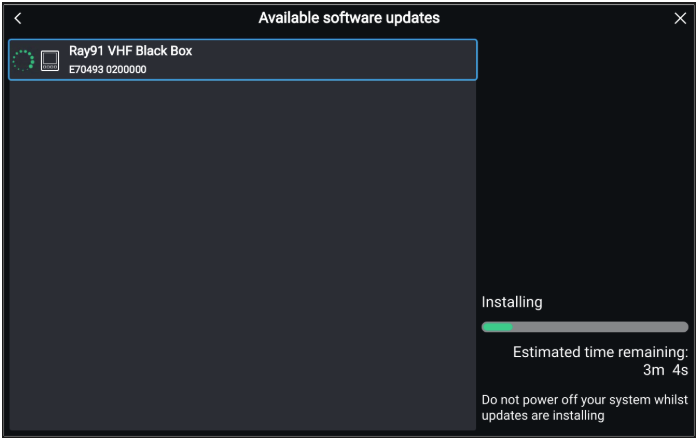
IMPORTANT: Do not interrupt the update, do not remove the handset from charging, and do not turn off the power during an ongoing update.
IMPORTANT: If the update fails and the handset gets stuck in Boot Code mode – contact product support for recovery advice.
IMPORTANT: If parts of the system are not updated: reduce the amount of data on the STng network by disconnecting/pausing products (e.g., AIS, autopilot, digital switching) and try flashing the application file again.
If problems persist: Contact product support for further instructions.
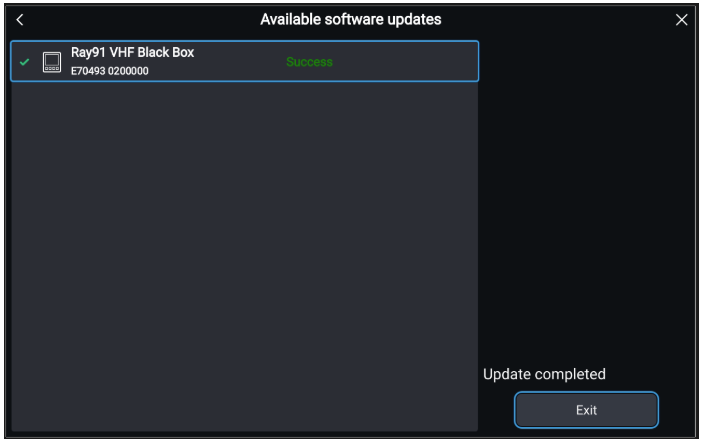
Confirm that all units are running the latest versions via the radio:
Important: A wired handset cannot display the software for a wireless handset and vice versa.
Check from the wired handset for wired units and from the wireless handset for wireless units. Menu: Menu > Set‑Up > Maintenance > About this unit and scroll to verify Application and Second Station Handset (if installed).
Software / Boot Code for RAY90 / RAY91
Software / Boot Code for RAY53 / RAY63 / RAY73
If the Second Station handset has very old software and cannot upgrade to the latest version, it may become incompatible with Ray60/Ray63/Ray70/Ray73/Ray90/Ray91 running the latest app. Symptoms: completely dark screen. Action: re-flash the app in the radio, ensure Second Station handsets are powered on and – if they have very old software v1.26 – put them in programming mode.
Second Station handsets with v1.55+ connected to Ray60/70 with the latest software may have minor incompatibilities (missing letters in some pop-up messages). Ray60/70 cannot be further updated for full compatibility. Note also that Second Station handsets upgraded to the latest software cannot be downgraded.