
 Svenska
 Dansk
Dansk
 Suomi
Suomi
 Español
 Deutsch
 Français
 Italiano
 Nederlands
 Polskie
 Norsk
Norsk
Cart
Your cart is empty, but doesn't have to be..
Discount: 0.00 EUR
Digital Skipper |31/05, 2022
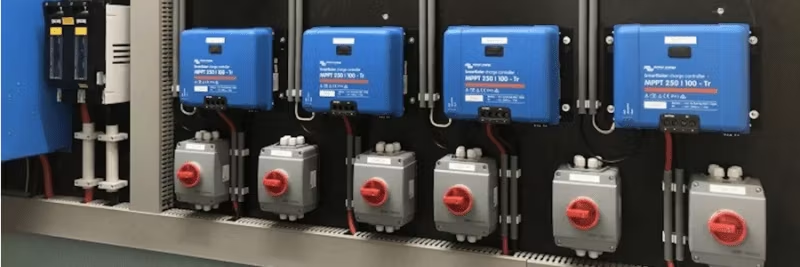
There are many situations where it is advantageous to use multiple SmartSolar controllers to charge the same battery bank. By connecting them in a VE.Smart network, you can make them work as a single large charger. Here we go through how it works, when it is needed, and how to configure the system step by step.
When you connect multiple SmartSolar charge controllers in a VE.Smart network, the charging algorithm is automatically synchronized. The chargers switch simultaneously between charging stages, for example, from bulk to absorption, without additional hardware. This provides a smoother and more efficient charge.
The chargers select a master that controls the charging algorithm. The master ensures that all chargers have the same voltage setpoint and charging status. Important: battery settings must be identical on all chargers. However, the current is regulated individually by each charger depending on the PV array, cable resistance, and max setting.
At the beginning of the day, the master measures the battery's idle voltage before charging starts. This information is used to calculate absorption time and is shared with the other chargers. If the master is disconnected (e.g., the sun goes down), the algorithm can be resumed by the other chargers.
There are systems where synchronization is not needed, for example:
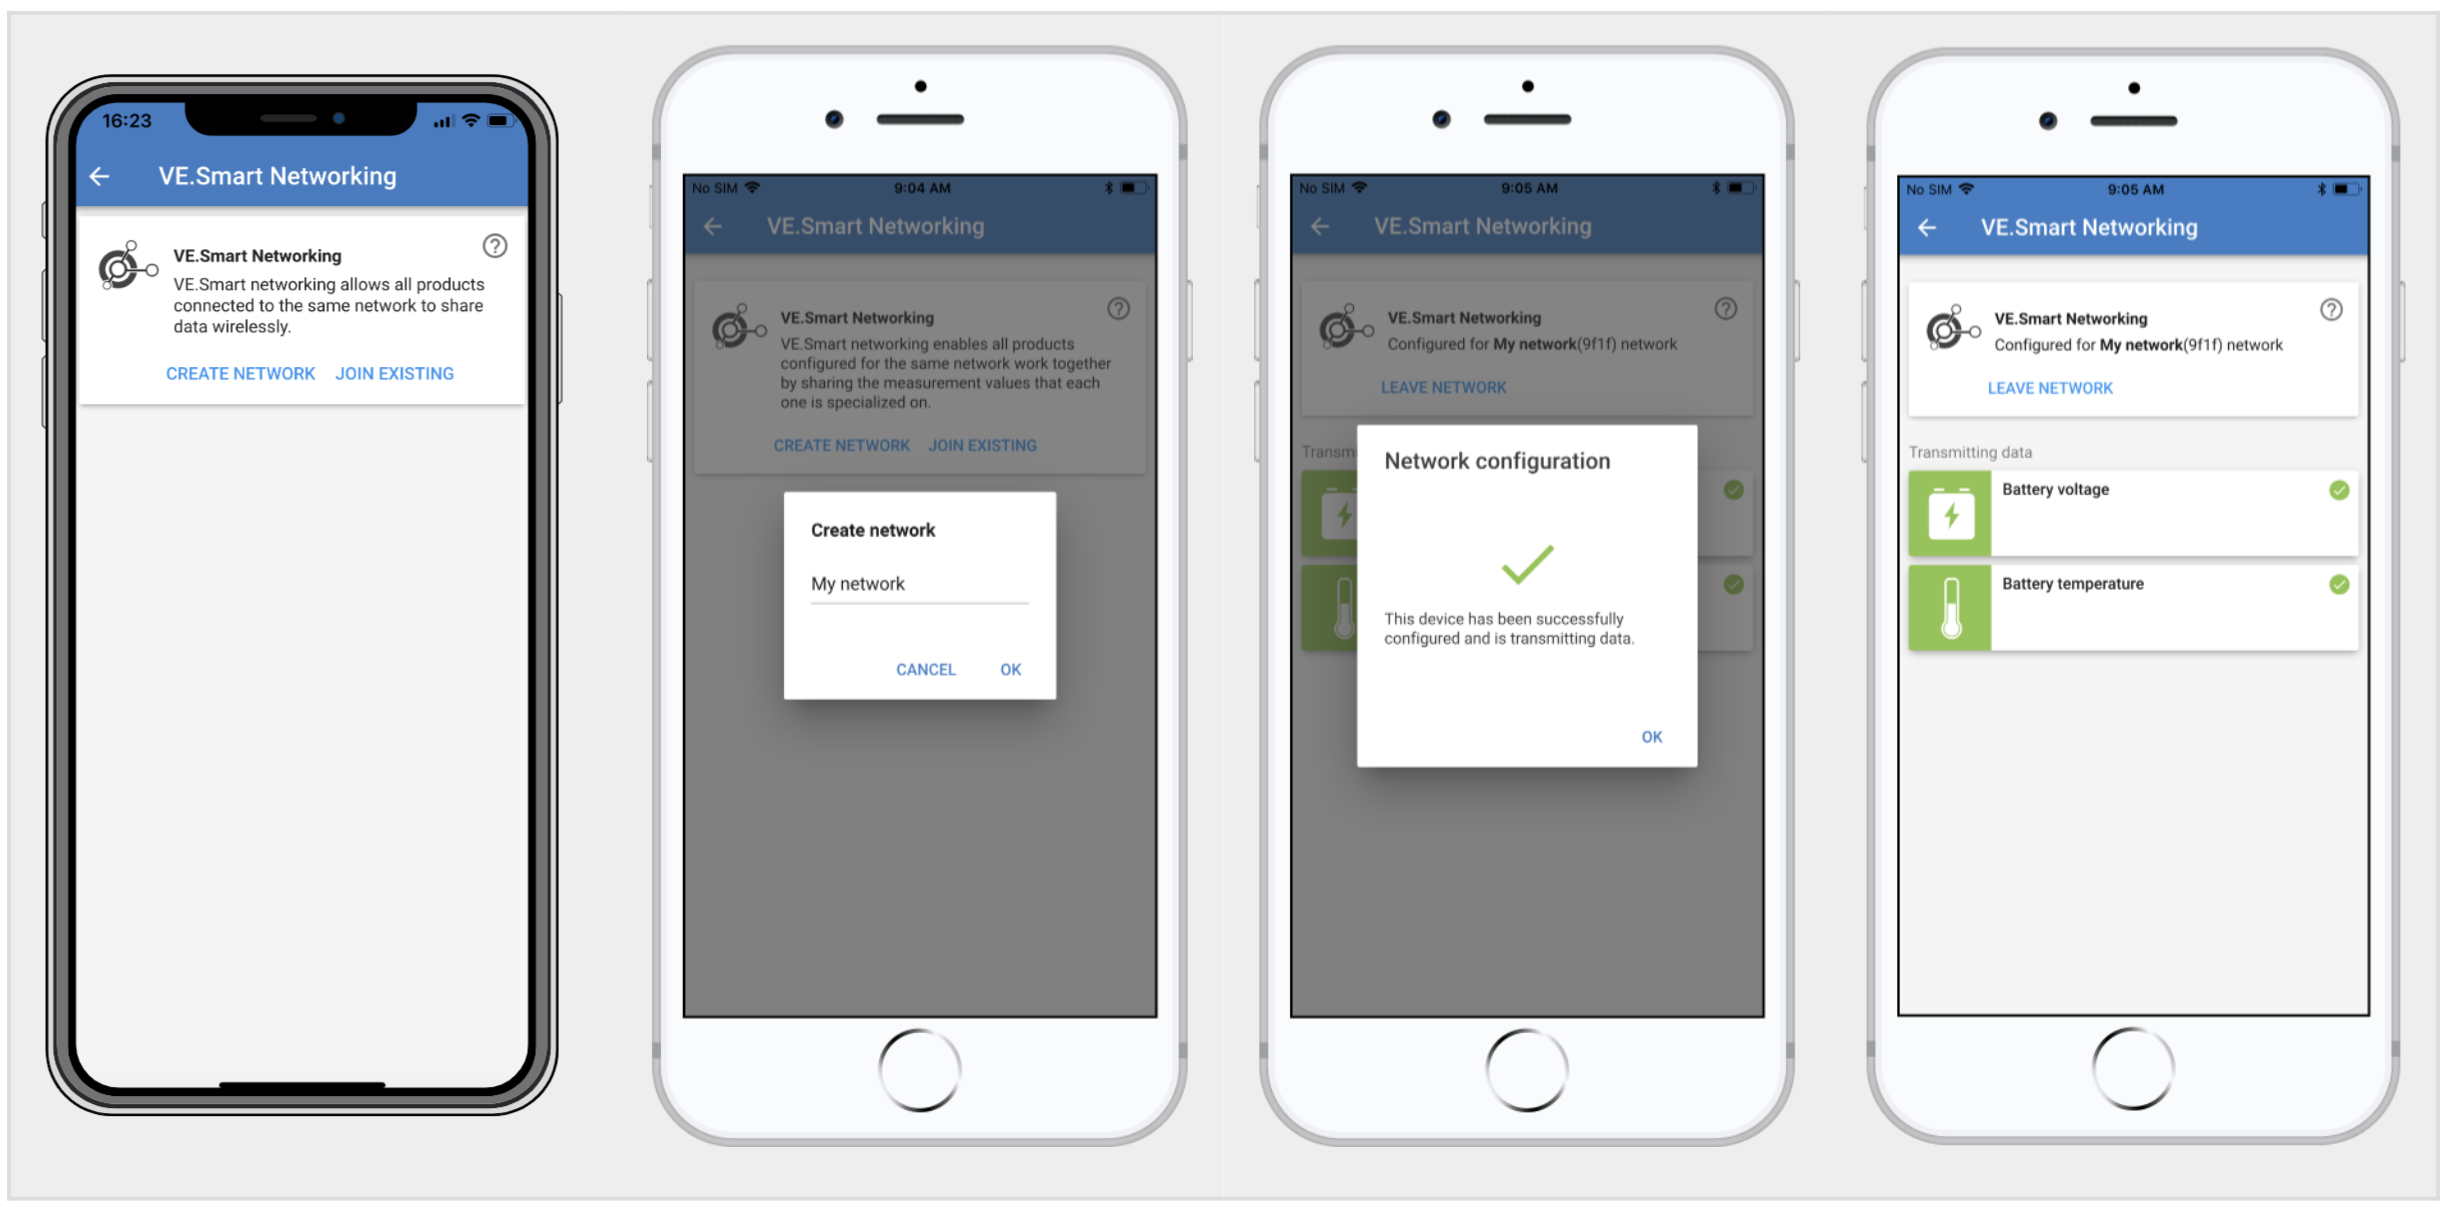
1. Set up Smart Battery Sense or BMV
Open VictronConnect, connect the device, and go to Settings → VE.Smart Networking. Click on Create network, enter a name, and save.
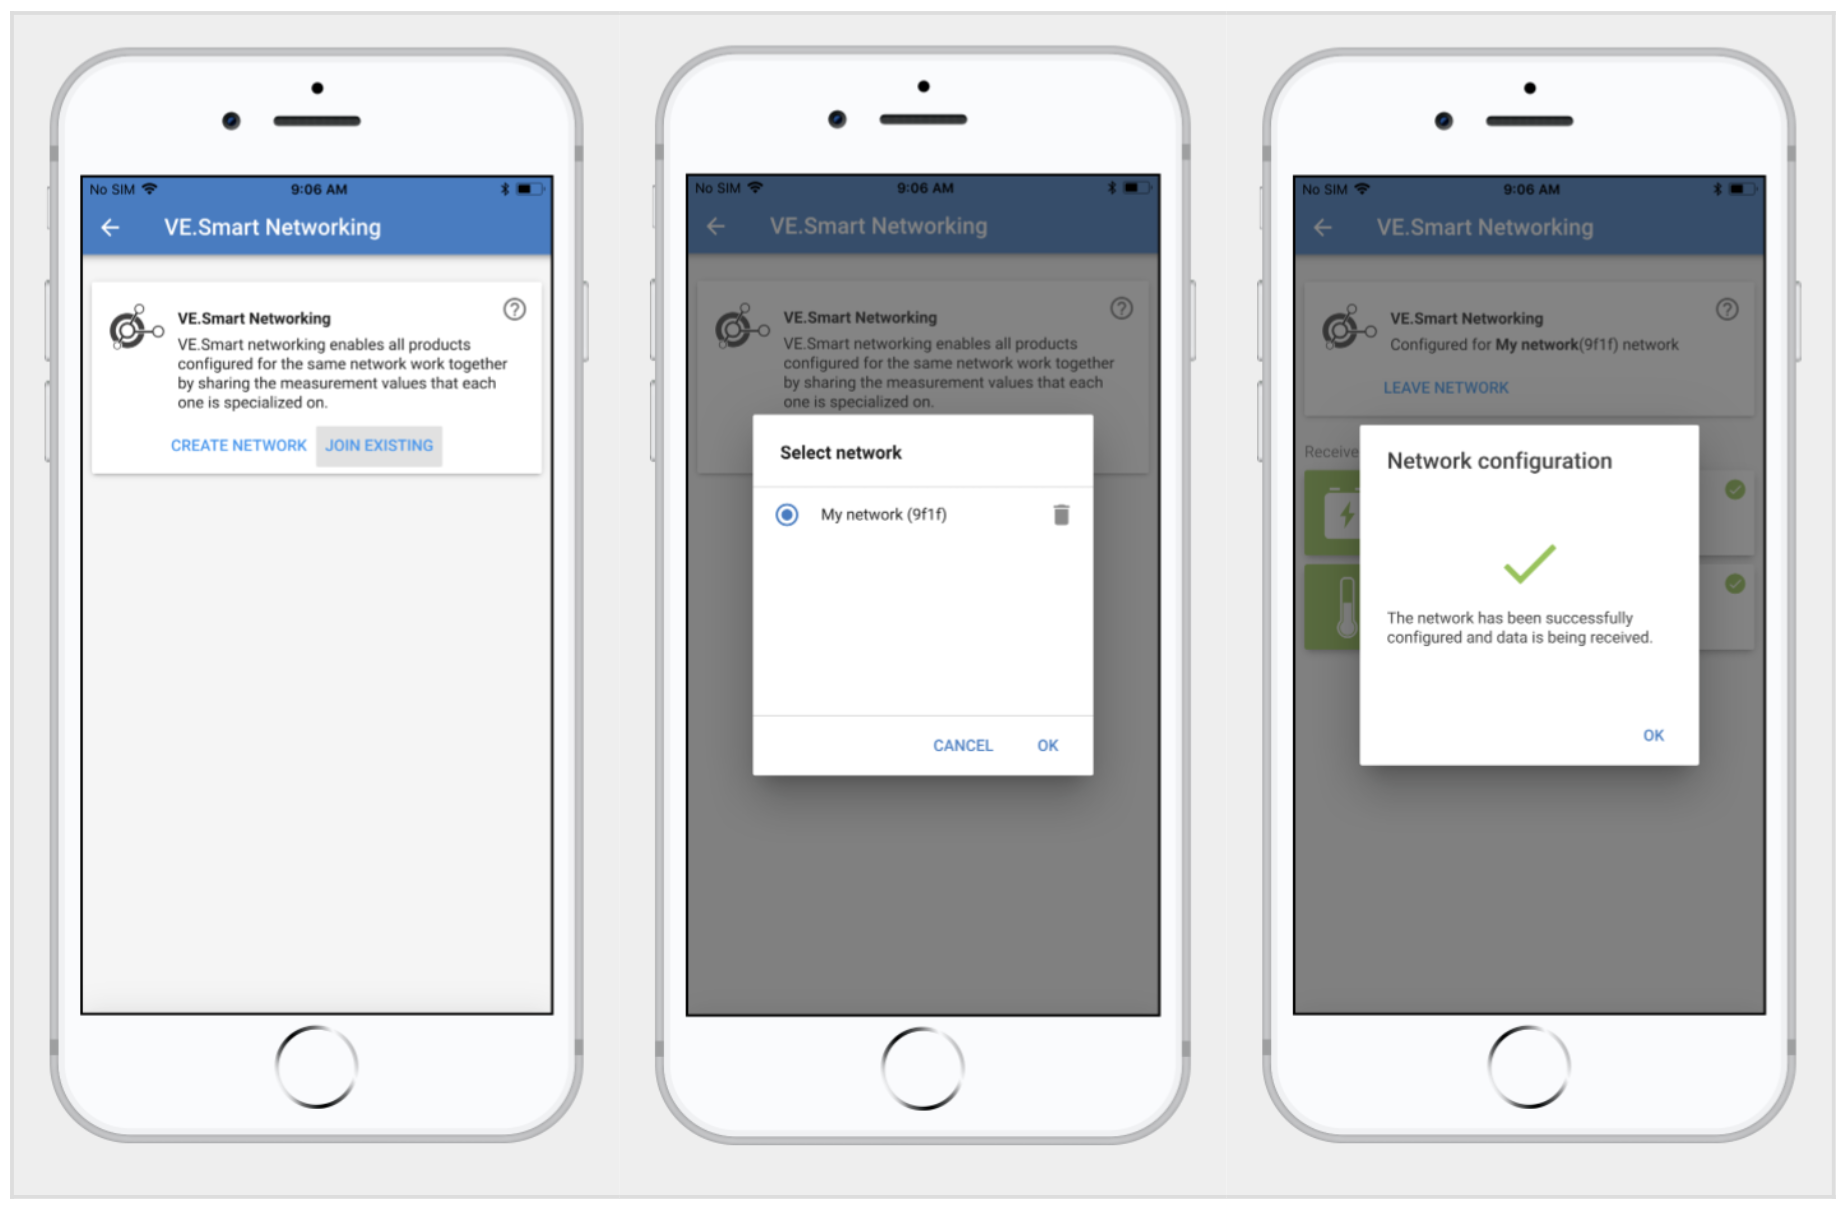
2. Connect SmartSolar chargers
Go to Solar charger → Settings → VE.Smart Networking → Join Existing. Select the network you created.
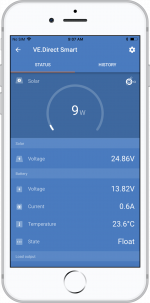
3. Verify operation
Check that the VE.Smart Networking page shows data and that the network icon is visible on the main page.

Read more in the Smart Battery Sense manual.