
 Svenska
 Dansk
Dansk
 Suomi
Suomi
 Español
 Deutsch
 Français
 Italiano
 Nederlands
 Polskie
 Norsk
Norsk
Cart
Your cart is empty, but doesn't have to be..
Discount: 0.00 NOK
Digital Skipper |25/06, 2024
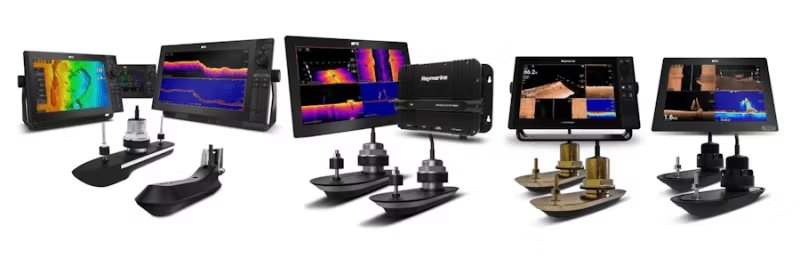
This FAQ is part of our series for troubleshooting SONAR systems. Here you will find detailed guides to investigate and resolve common SONAR issues, including interference and settings. Whether you are using an RV, RVM, or AIRMAR CHIRP SONAR system, we offer step-by-step instructions to ensure optimal performance. Do you need help with installation or testing? Then this is the right place.
PART 1 – SONAR ERROR: No Transducer Connected
PART 2 – Introduction to SONAR Interference
PART 3 – SONAR Interference Investigation – Manual Setup
PART 4 – SONAR Setup & Test: When SONAR is not affected by interference
PART 5 – SONAR Setup & Test: When SONAR is affected by interference
PART 6 – RV and RVM Transducer Sense Resistor Test
NOTE: If you are not familiar with these systems, contact Product Support or an authorized Raymarine Dealer for assistance with setup and testing.
Ensure your AXIOM has the latest software before proceeding. Check the latest version here.
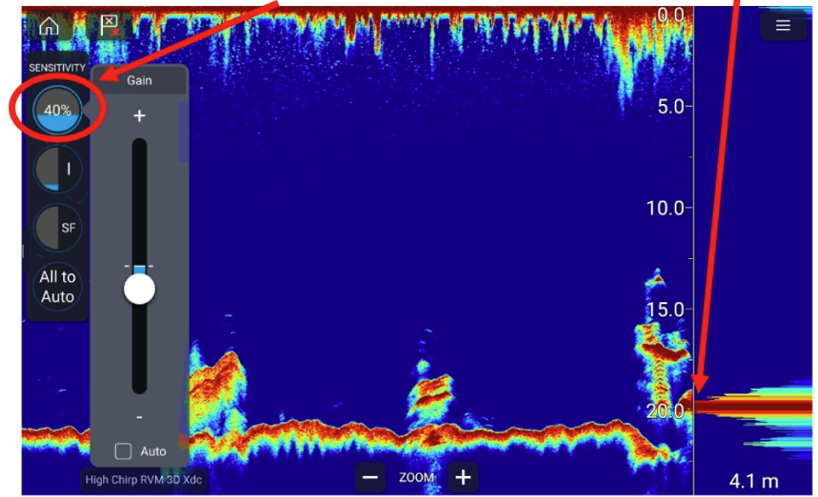
For testing purposes, enable A-Scope only and turn off features like Bottom Fill.
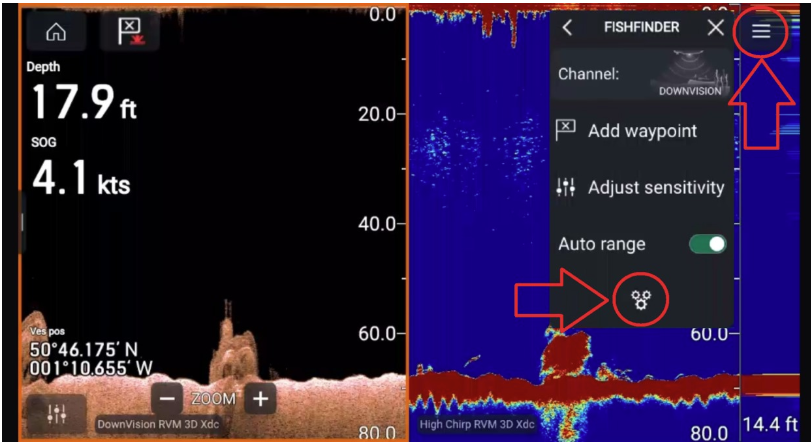
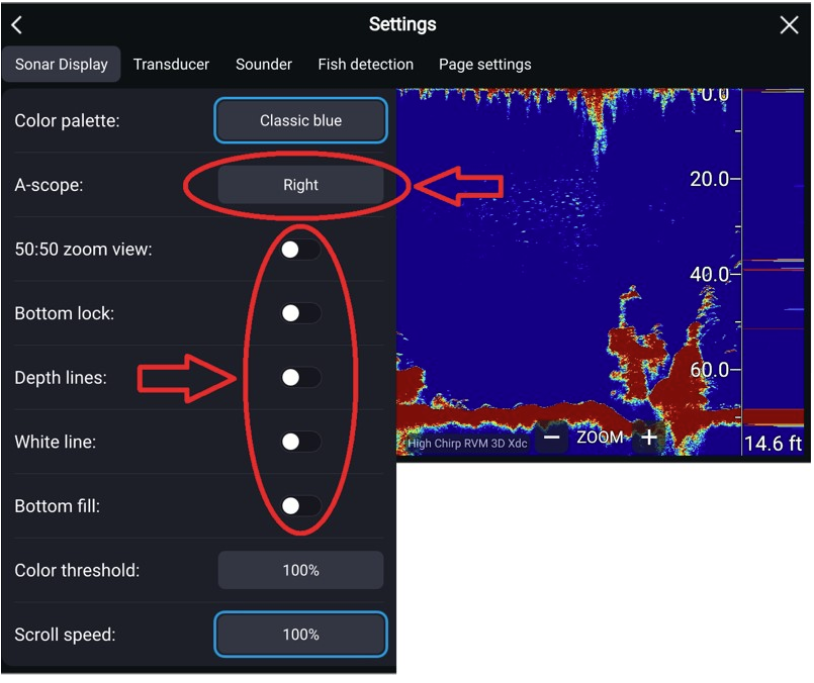

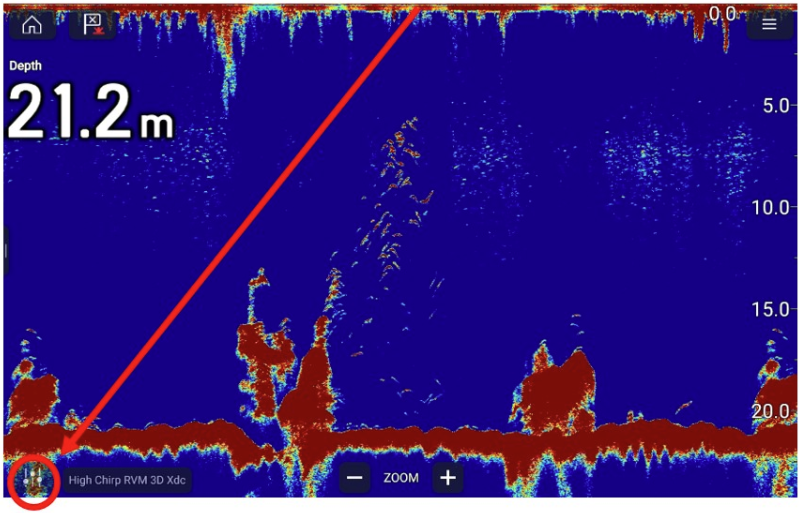

With the correct settings, your SONAR screen should look like the image below: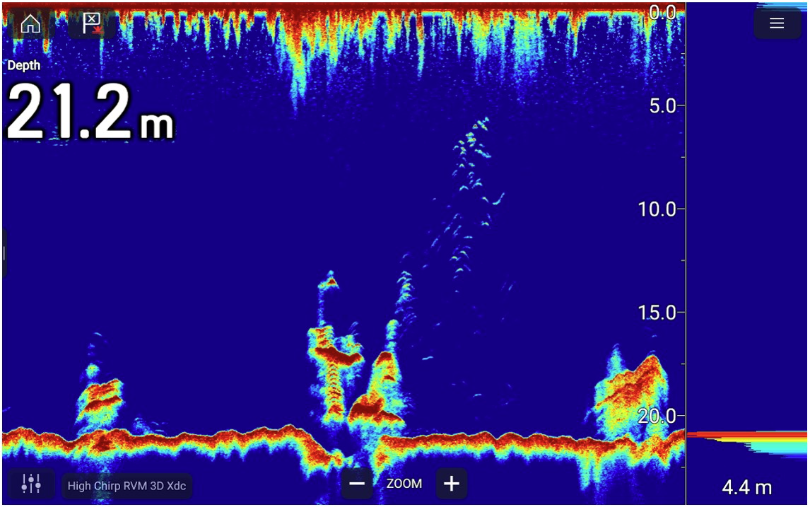
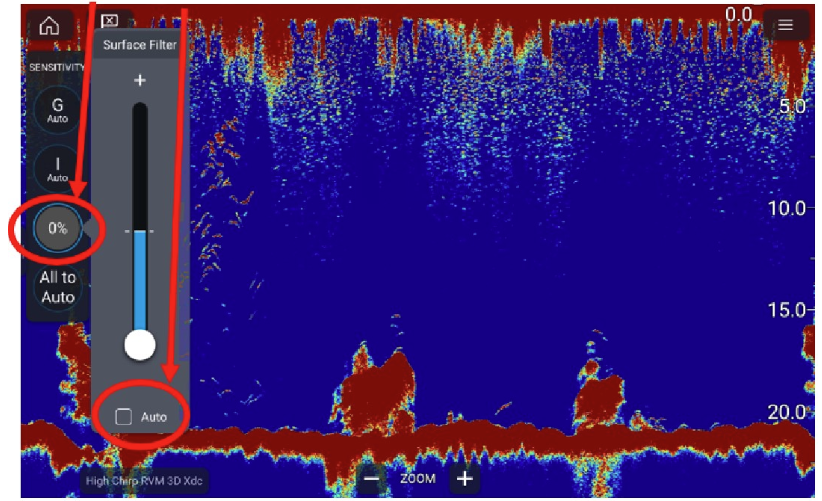
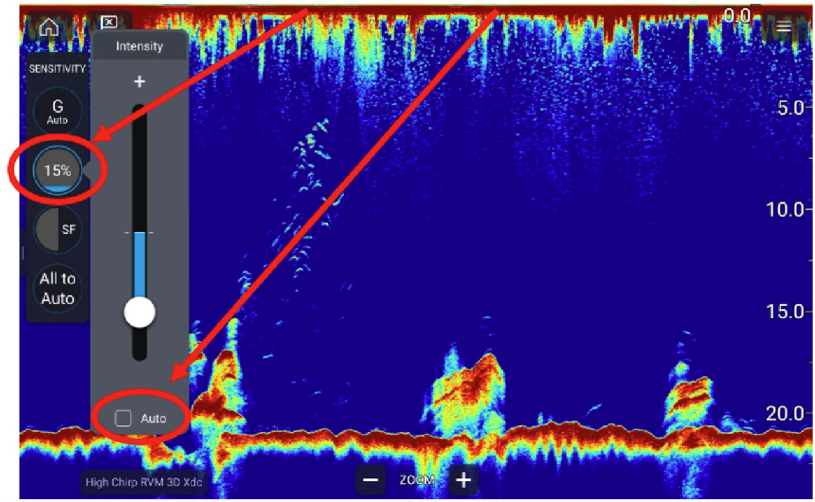
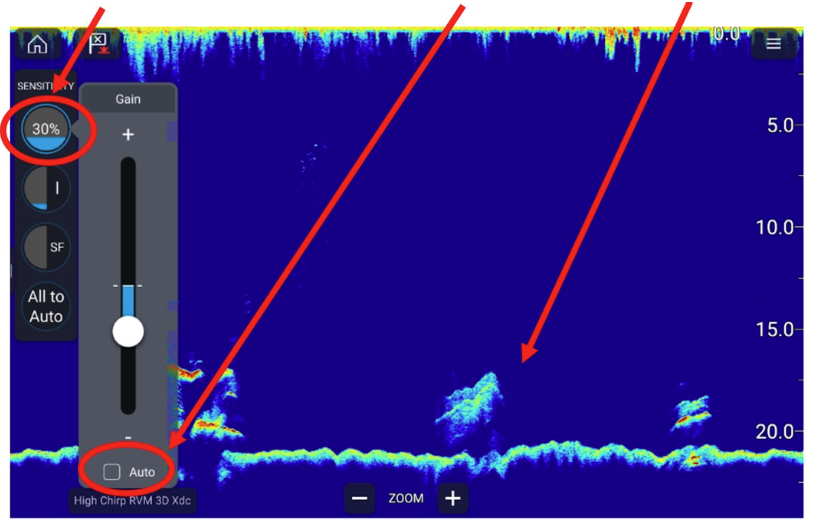
Avoid too low or too high GAIN: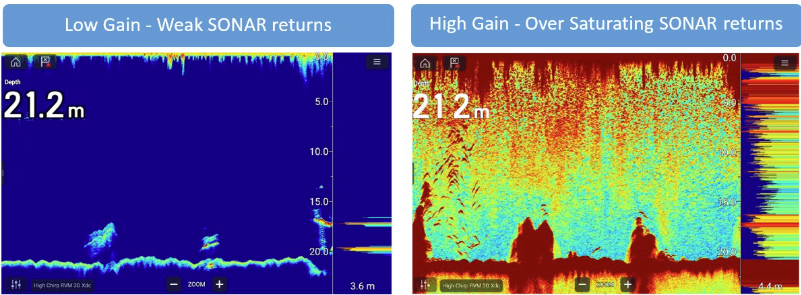
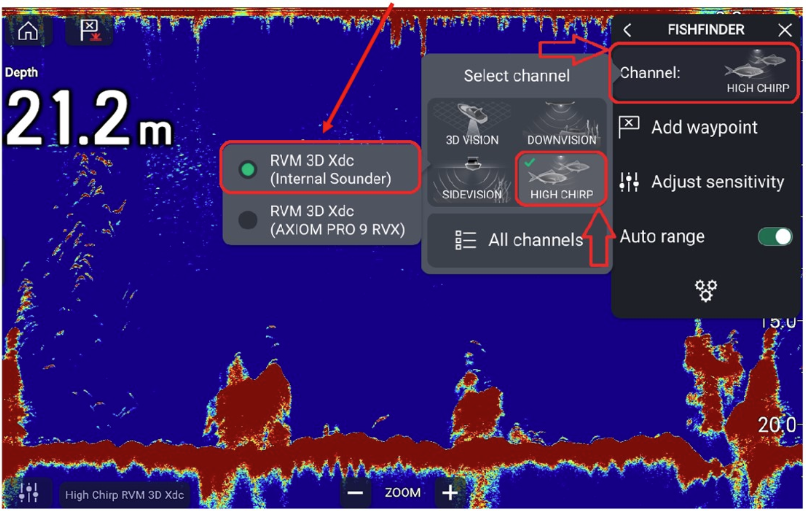
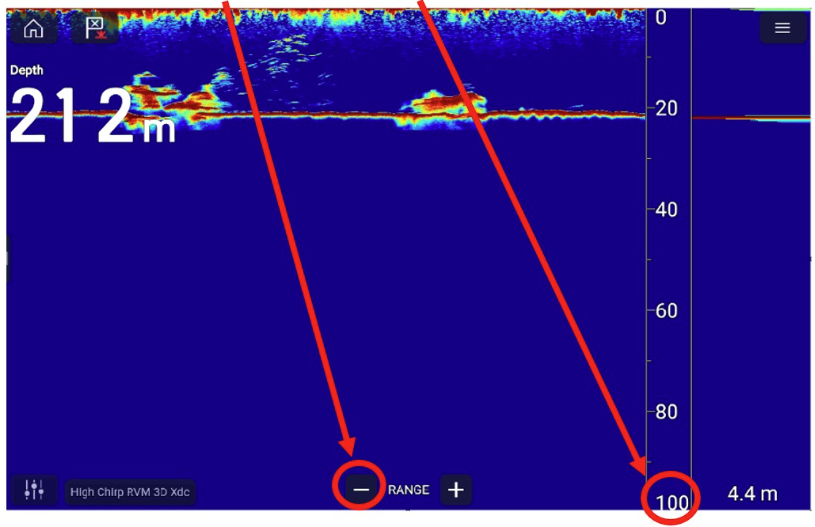
Perform tests with both AUTO and MANUAL range to identify interference. Follow these steps:
Analyze the results to determine if interference is caused by devices, engine, or transducer installation.