
 Svenska
 Dansk
Dansk
 Suomi
Suomi
 Español
 Deutsch
 Français
 Italiano
 Nederlands
 Polskie
 Norsk
Norsk
Cart
Your cart is empty, but doesn't have to be..
Discount: 0.00 GBP
Digital Skipper |11/06, 2024
This FAQ is part of our new series for troubleshooting Sonar systems. Here you will find guides to investigate and resolve common SONAR issues, including interference and settings. Whether you are using an RV, RVM, or AIRMAR CHIRP SONAR system, we offer step-by-step instructions to ensure optimal performance. If you need help with installation or testing.
PART 1 - SONAR ERROR - No Transducer Connected Investigation Guide
PART 2 - Introduction to SONAR Interference
PART 3 - SONAR Interference Investigation – Manual Setup
PART 4 - SONAR SETUP & TEST - When SONAR is not affected by interference
PART 5 - SONAR SETUP & TEST - When SONAR is affected by interference
PART 6 - RV and RVM Transducer Sense Resistor Test
Before proceeding with troubleshooting and setting up your system, ensure your AXIOM has the latest software. Follow the link below to check the latest software version for your AXIOM and more information on how to update via WIFI or micro SD card. https://www.raymarine.eu/service-and-support/software-updates/mfds/lighthouse4/axiom-models/
The process below explains what to do when you have detected interference on a SONAR system. If you still see interference even with all (or most) devices in the system turned OFF and the engine turned OFF, follow our new guide which provides additional troubleshooting steps. If you cannot perform all or part of the following suggestions below, you can ask for help from Product Support or an Authorized Raymarine Dealer.
Interference can be caused by poor or no grounding on a SONAR system. Make sure you follow the instructions from the installation manual for the SONAR module or AXIOM that acts as the main sonar source installed onboard and test to see if this resolves the interference issues.

You can download the latest version of any Raymarine manual by clicking the link below. https://www.raymarine.com/en-gb/support/raymarine-user-manuals
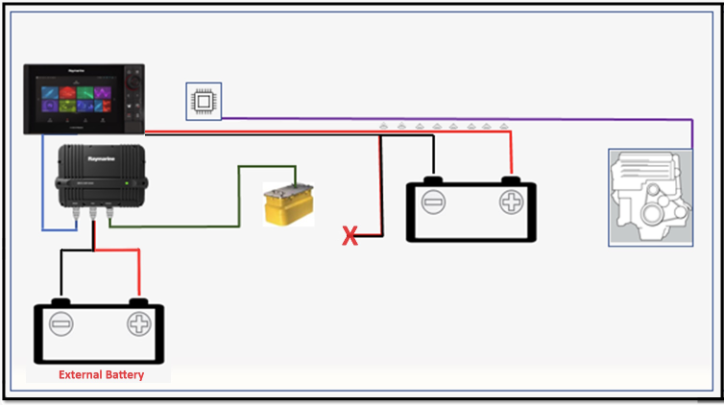
Isolate the power supply. This is done by isolating the power supply for the SONAR module or AXIOM and connecting it to an external battery that is not connected to anything else. Any problems related to the power supply will be eliminated in this way.
SONAR module to AXIOM
Disconnect the SONAR module from the main power supply and connect it to an external power supply as shown.
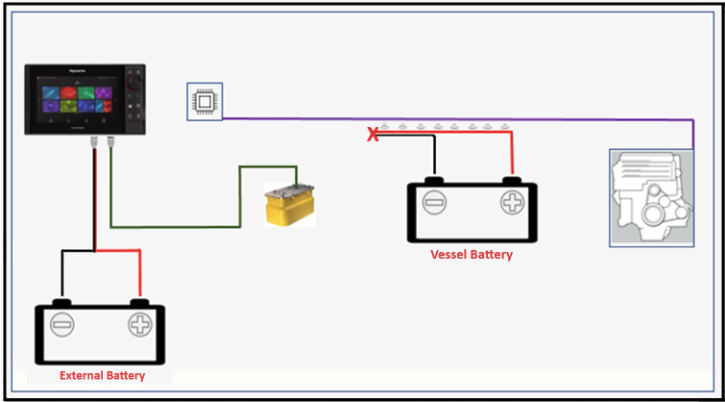
 You do not need to change the AXIOM's power supply if its internal SONAR is used. If this is the case, see example below.
AXIOM Internal SONAR
Disconnect the AXIOM from the main power supply and connect it to an external power supply as shown.
Interference can be transmitted from an external source to the transducer cable (wiring) or the transducer itself. The best way to test if this is the case is to connect another transducer to the AXIOM or SONAR module, run the cable loosely (not via wiring) and place the transducer on the side of the boat and in the water (at least 60 cm deep).
SONAR module to AXIOM
Turn off the SONAR module, disconnect the permanent transducer from the SONAR module and connect the new test transducer on the side of the boat.
Do not permanently install the new transducer and do not run the cable through any wiring or vents. Run the cable loosely to the SONAR module.
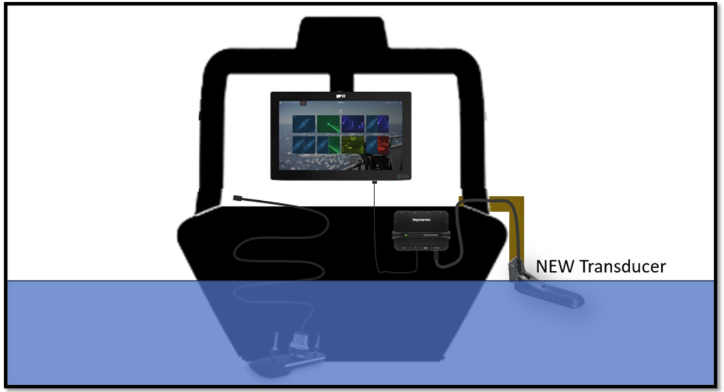
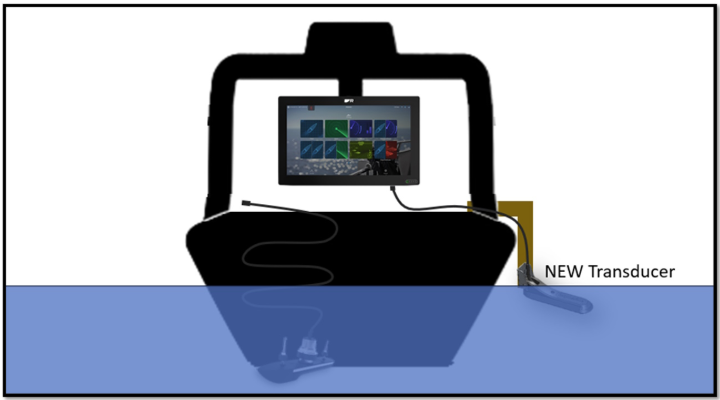
AXIOM Internal SONAR
Turn off the AXIOM, disconnect the permanent transducer from the AXIOM and connect the new test transducer on the side of the boat.
Do not permanently install the new transducer and do not run the cable through any wiring or vents. Run the cable loosely to the AXIOM.
This concludes the final part of our Sonar Troubleshooting Guide series. If you are still experiencing interference issues on your boat, do not hesitate to ask for help from Product Support or contact your local authorized Raymarine Dealer.