
 Svenska
 Dansk
Dansk
 Suomi
Suomi
 Español
 Deutsch
 Français
 Italiano
 Nederlands
 Polskie
 Norsk
Norsk
Cart
Your cart is empty, but doesn't have to be..
Discount: 0.00 SEK
Digital Skipper |16/03, 2024

Raymarine SeaTalk interfaces are used in many older instruments such as ST40, ST60+, ST70, i50, i70, ST6002, S3G, and RL70. To integrate these with modern systems like SeaTalkng and GPS sensors (Raystar 130/150), correct connections and cables are required. This guide shows how to perform a proper installation to ensure stable communication and high accuracy.
All Raymarine products with a first-generation SeaTalk interface that do not also have a SeaTalkng interface should be connected to each other in any order using standard SeaTalk cable. You can use:
SeaTalk cable is available in lengths of 15", 1m, 3m, 5m, and 9m (D230, D284, D285, D286, and D287). This method is referred to as a SeaTalk bus.
To branch or extend the SeaTalk bus, connect it to a D244 SeaTalk junction block. The junction block then connects to the yellow (SeaTalk) port on an E22158 SeaTalk to SeaTalkng converter (updated with v2.07 or later software) using the cable included with the converter kit.
The Raystar 130/150 GPS sensor connects to one of the white SeaTalkng spur ports with the cable included with the sensor. Disconnect the SeaTalk bus from its current power source, as it will now receive power via the converter. Connect the SeaTalkng power cable to the other white spur port and to a 12VDC power source. Finally, two SeaTalkng termination plugs are installed in the blue backbone ports on the converter.
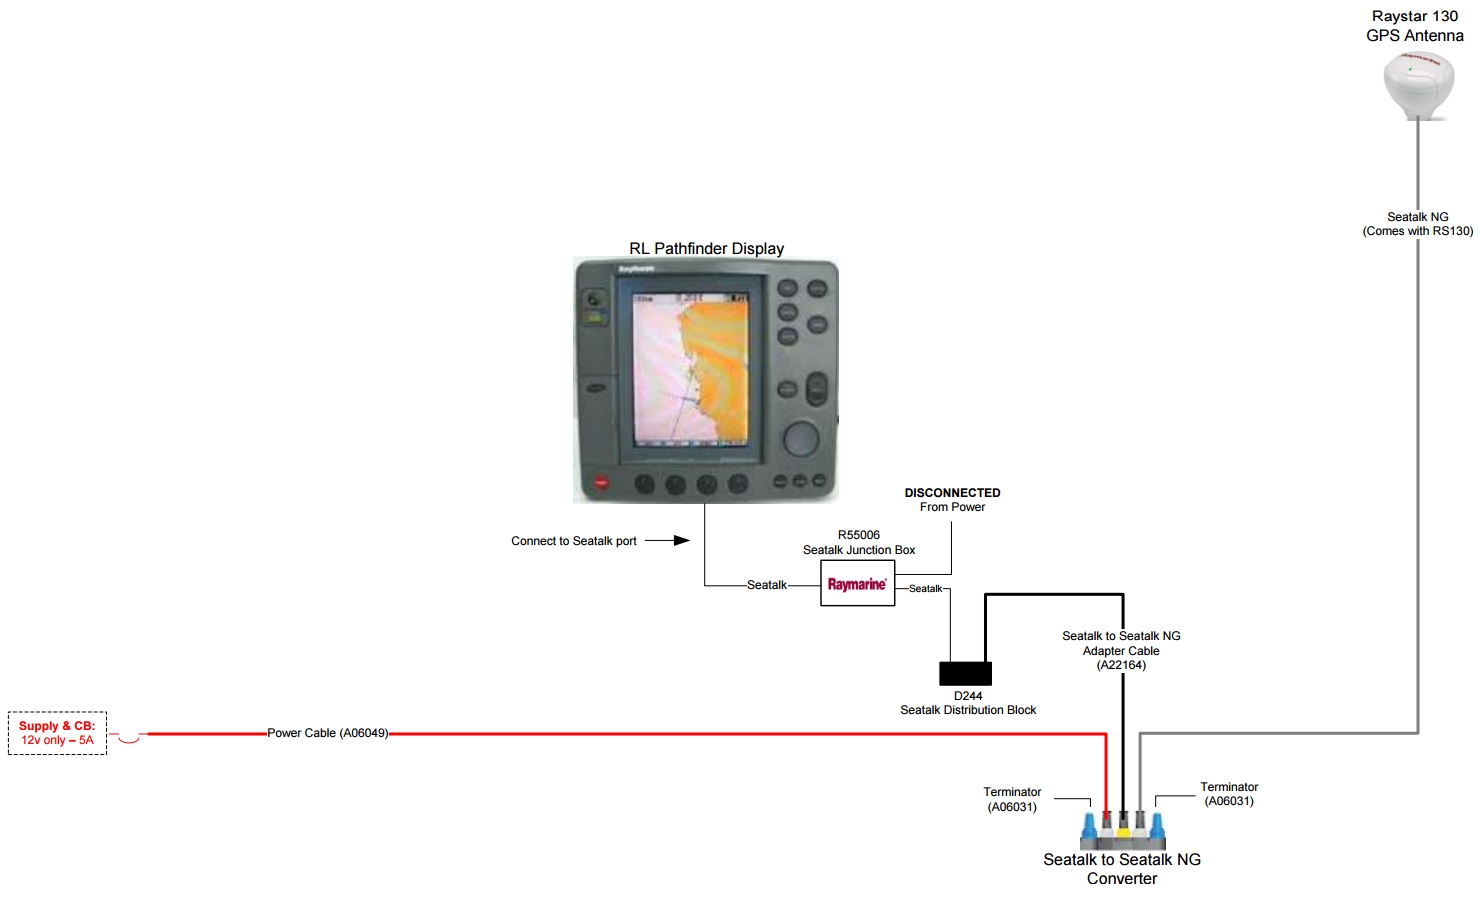
See the diagram below for how to connect a Raystar 130/150 GPS sensor to an hsb/hsb2/SL Pathfinder series radar, chartplotter, or sonar display:
At the time of this response, the SeaTalk to SeaTalkng converter software did not support the transfer of the following non-critical GPS data:
All other GPS data (latitude, longitude, UTC date, UTC time, and HDOP) are reported correctly. HDOP is used to determine the accuracy of the GPS position. When the Raystar 130/150 is installed with a clear view of the sky, HDOP is typically ≤ 1.0 (lower HDOP = higher accuracy).